
Many Google Cloud resources can have internal IP addresses and external IP addresses. For example, you can assign an internal and an external IP address to Compute Engine instances. The instances use these addresses to communicate with other Google Cloud resources and external systems.
| Type | Behavior |
|---|---|
| Internal IP | Private address inside your Google Cloud network (VPC). It stays the same for the VM’s life and is free. |
| External ephemeral IP | Public, reachable from the internet, but temporary. It may change when you stop or restart the VM. |
| External static IP | Public and permanent. You reserve it. If you reserve one and don’t attach it to anything, you are charged more. |
Hands-on: On IP Address
Set Up a VM with an Ephemeral IP
Goal: Show how a standard dynamic IP address changes when a VM is stopped and restarted.
- Go to the GCP Console and navigate to Compute Engine > VM instances.
- Click Create Instance.
- Keep the default settings (e.g.,
e2-medium, Debian/Ubuntu OS).
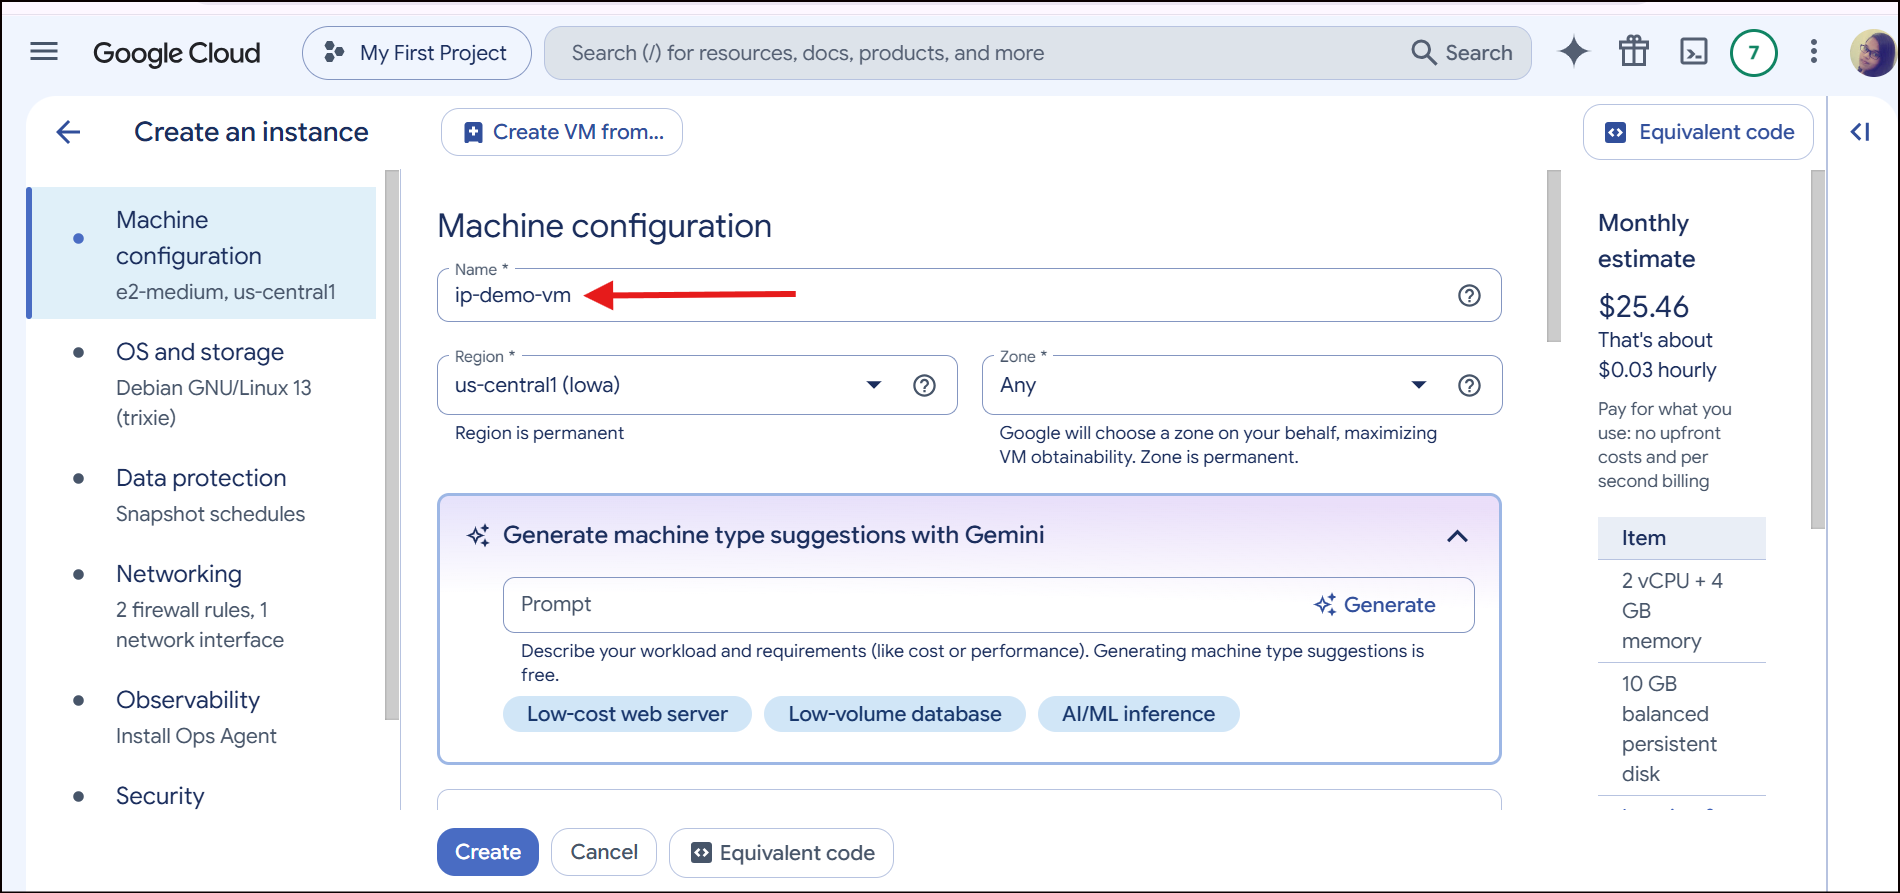
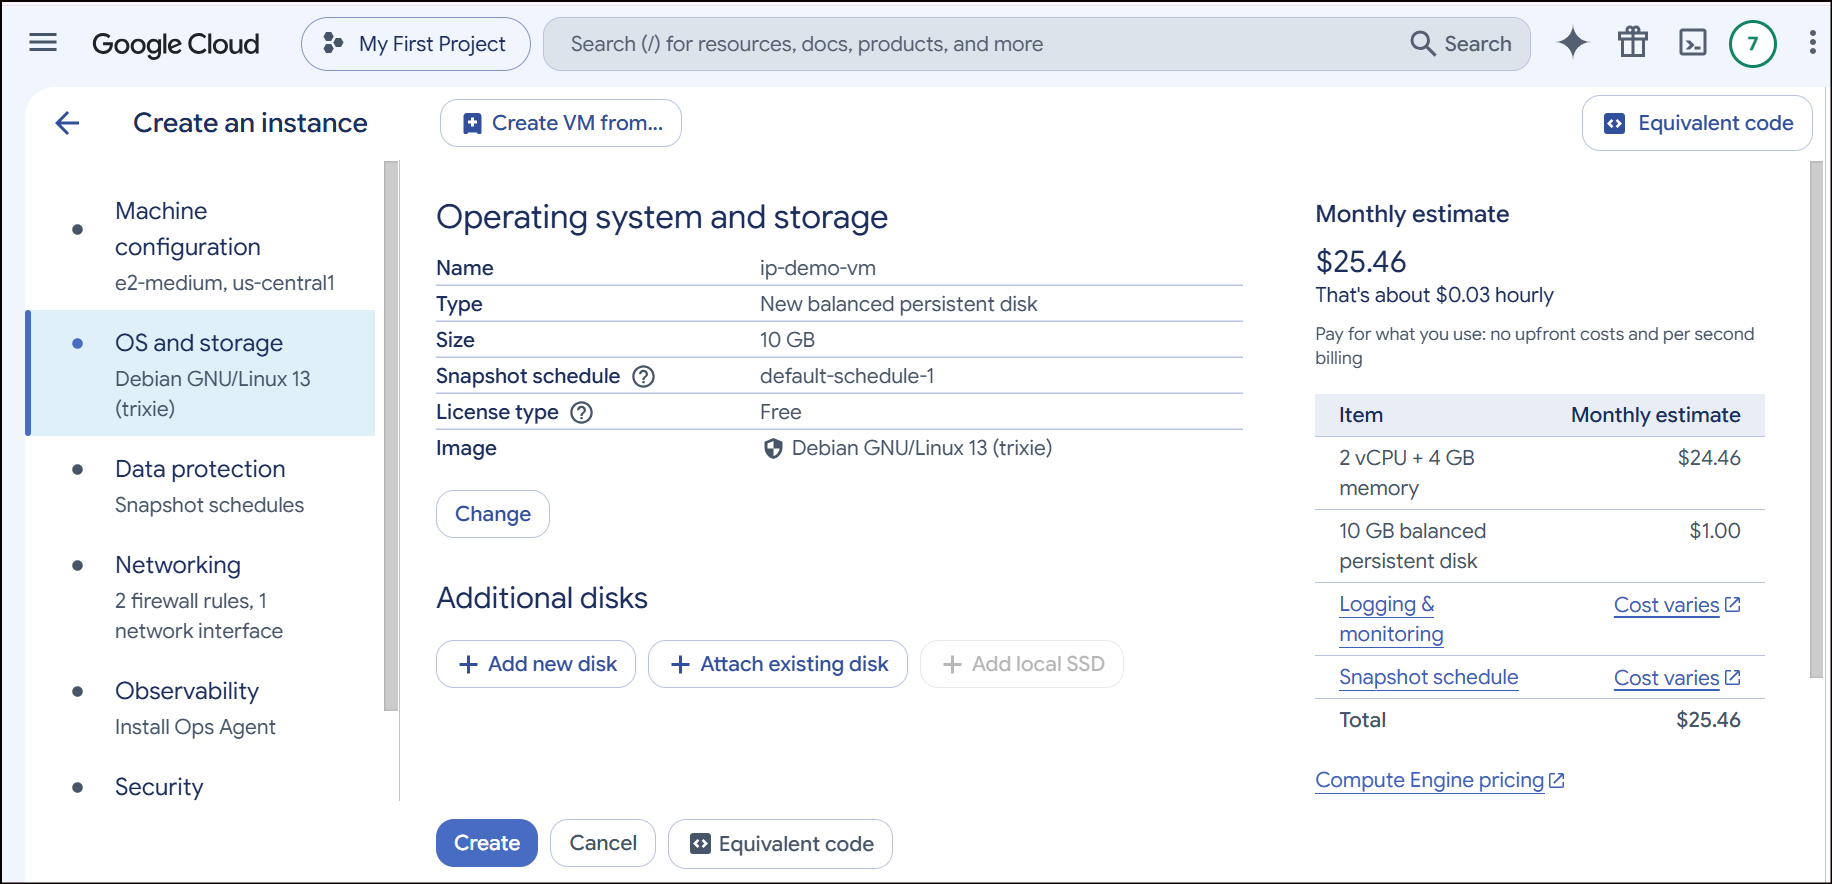
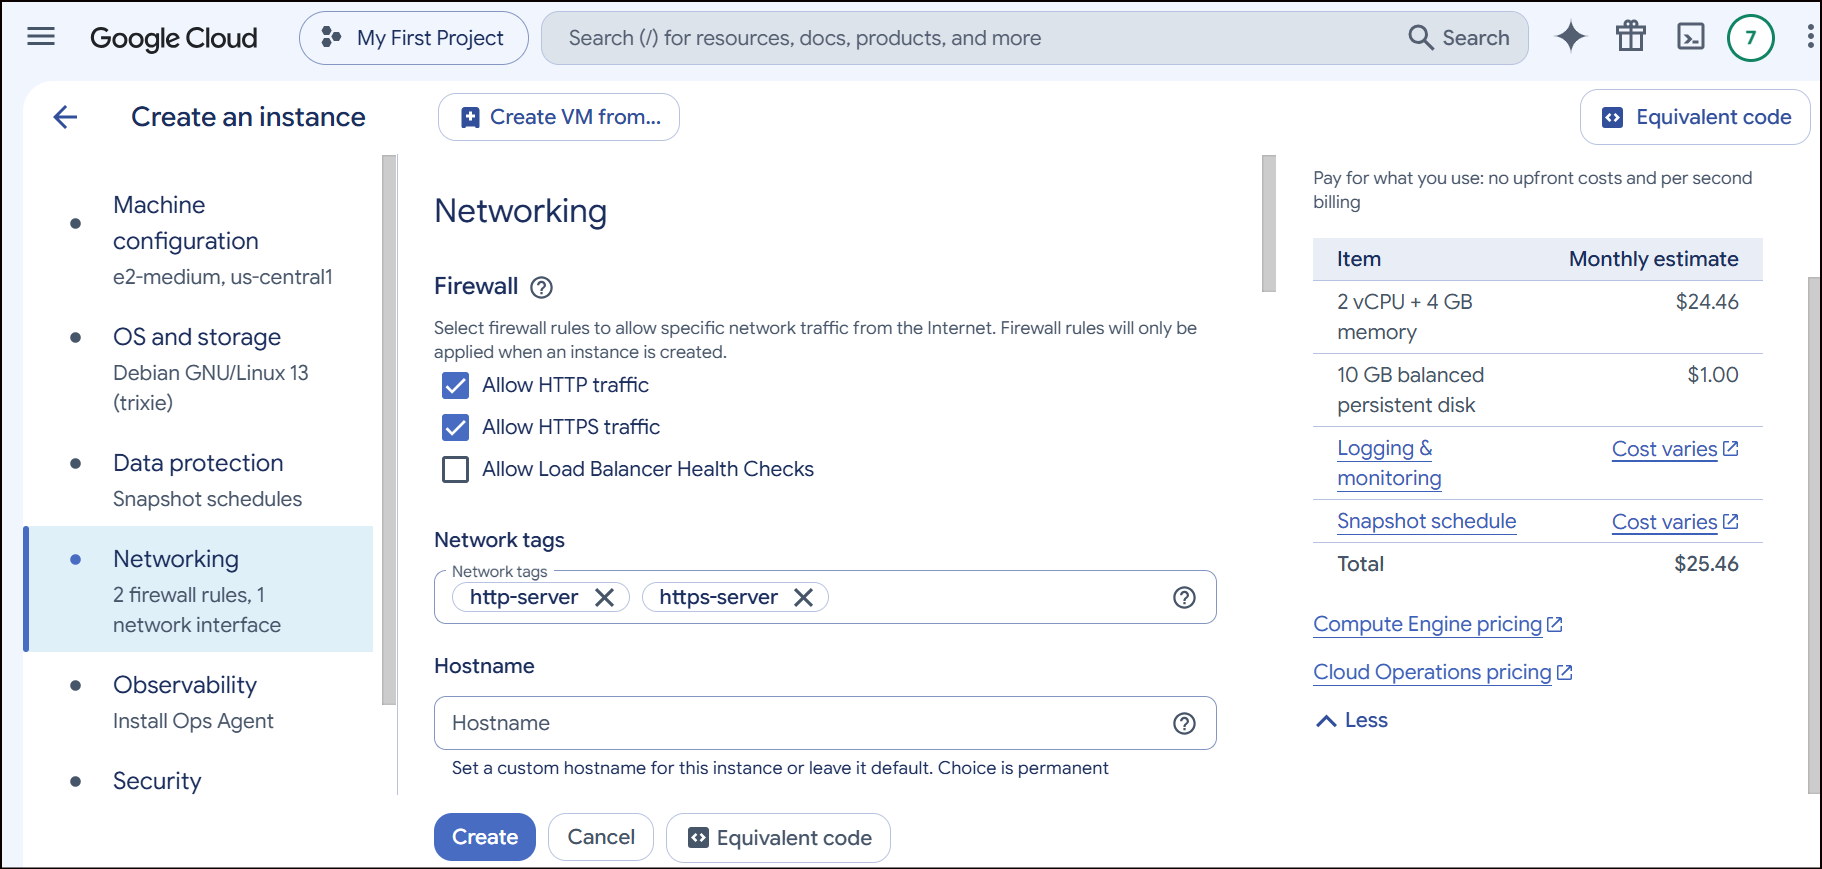
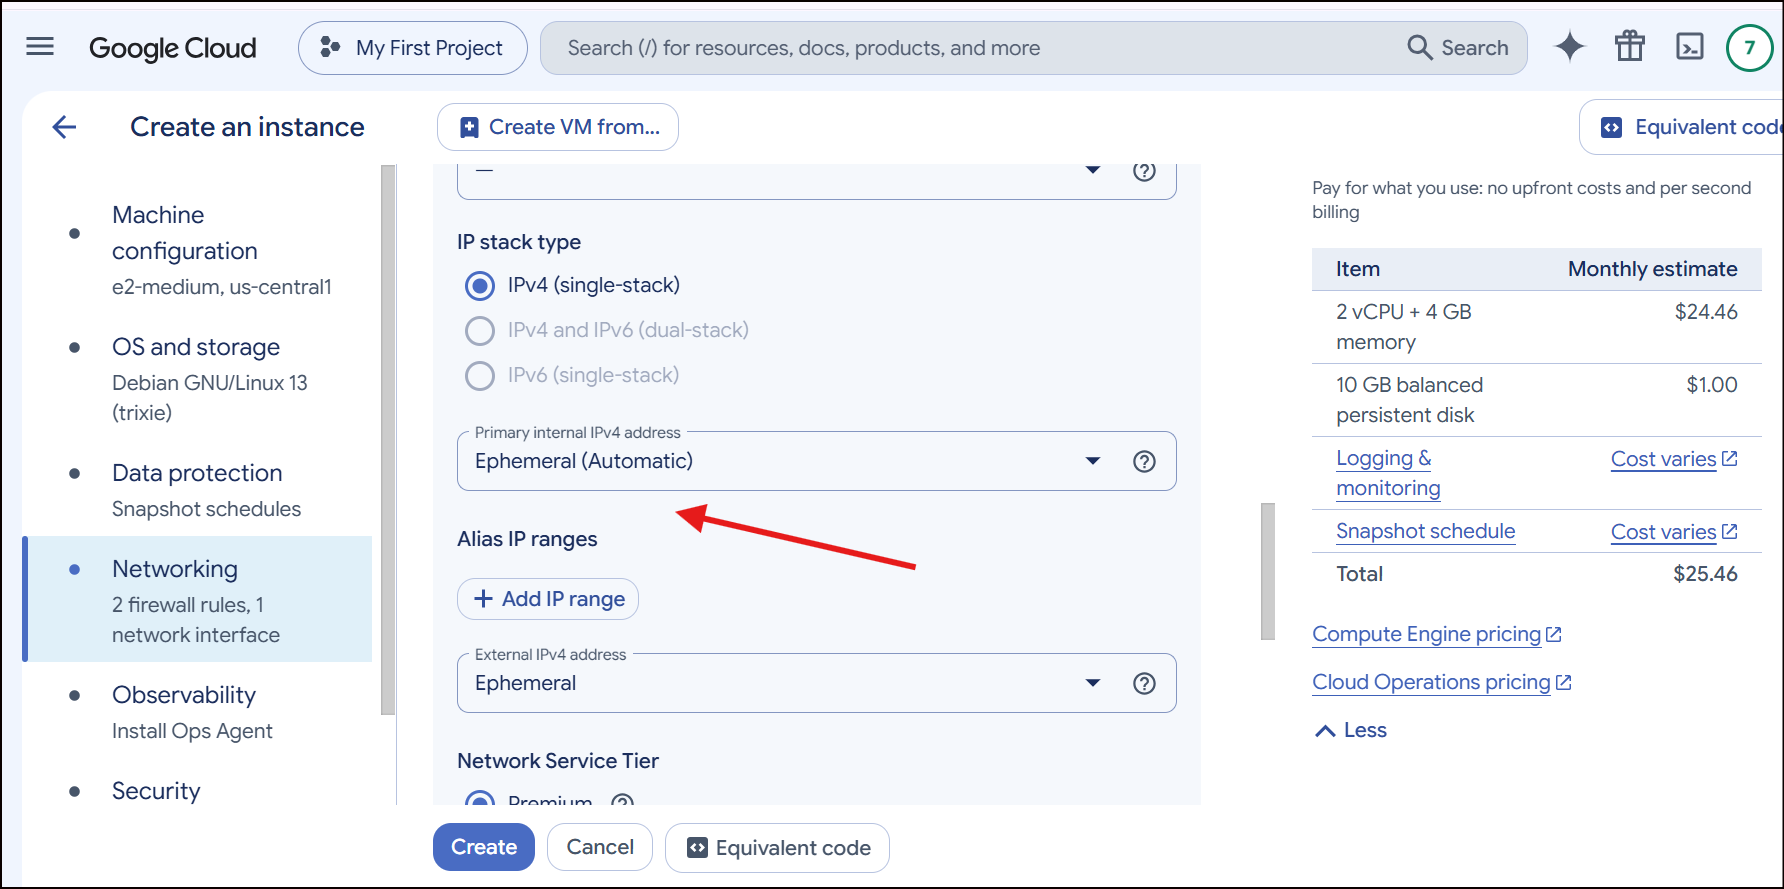
- Expand Networking > click on the default Network interface
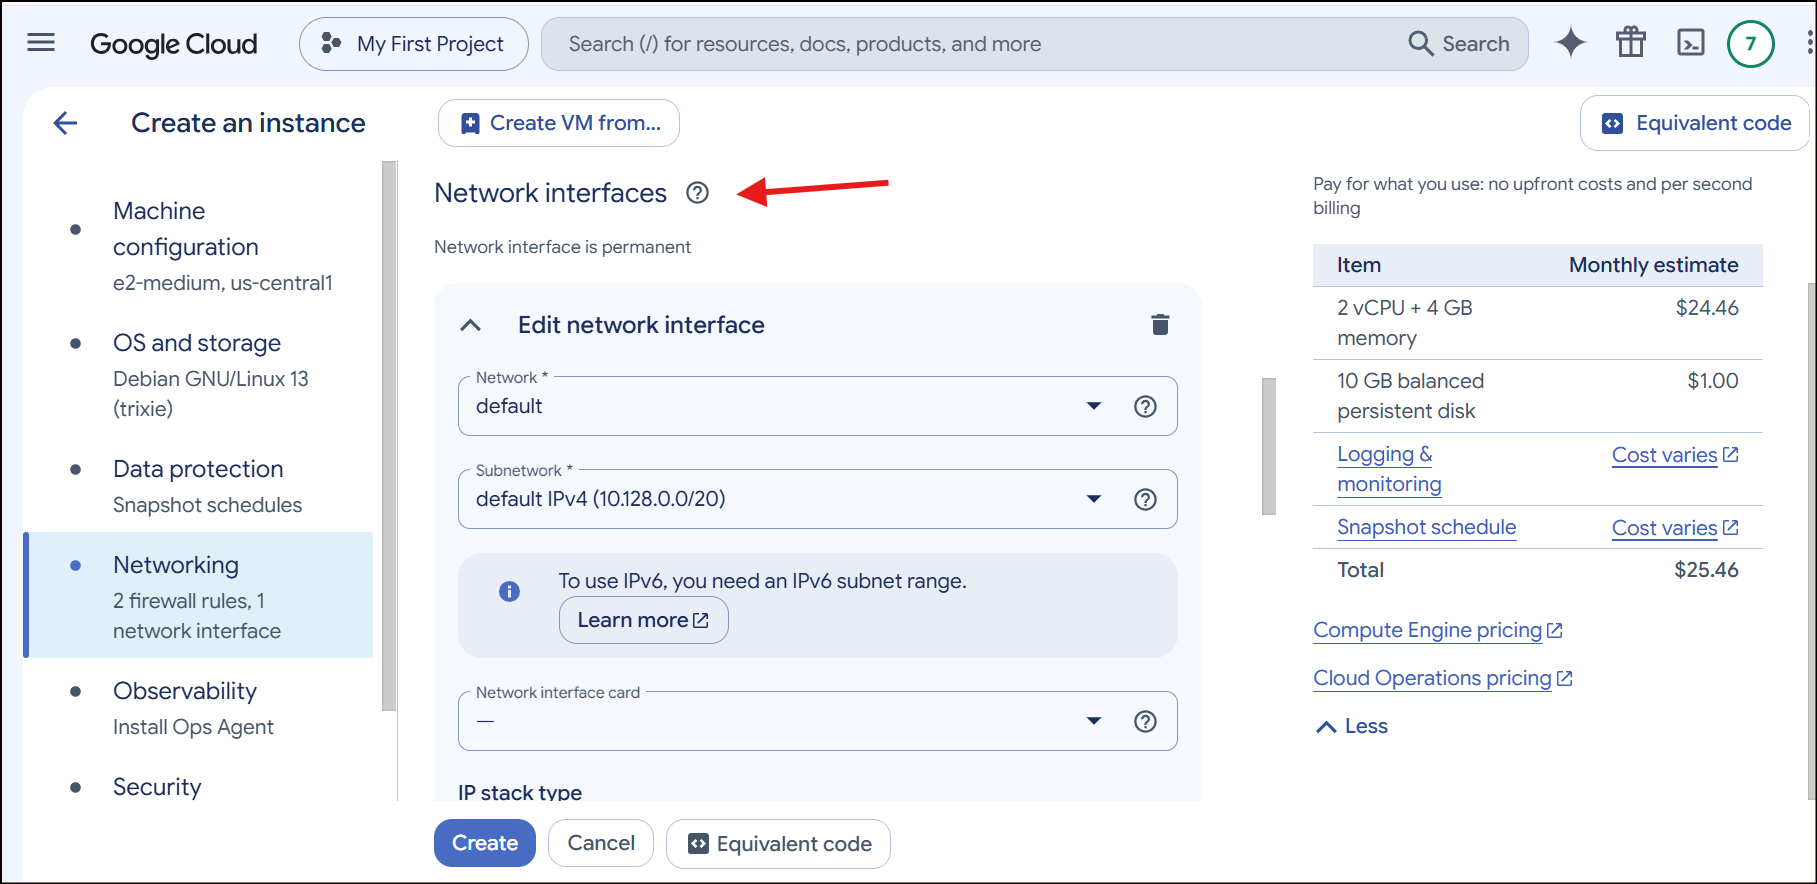
- Under External IPv4 address, ensure Ephemeral is selected.
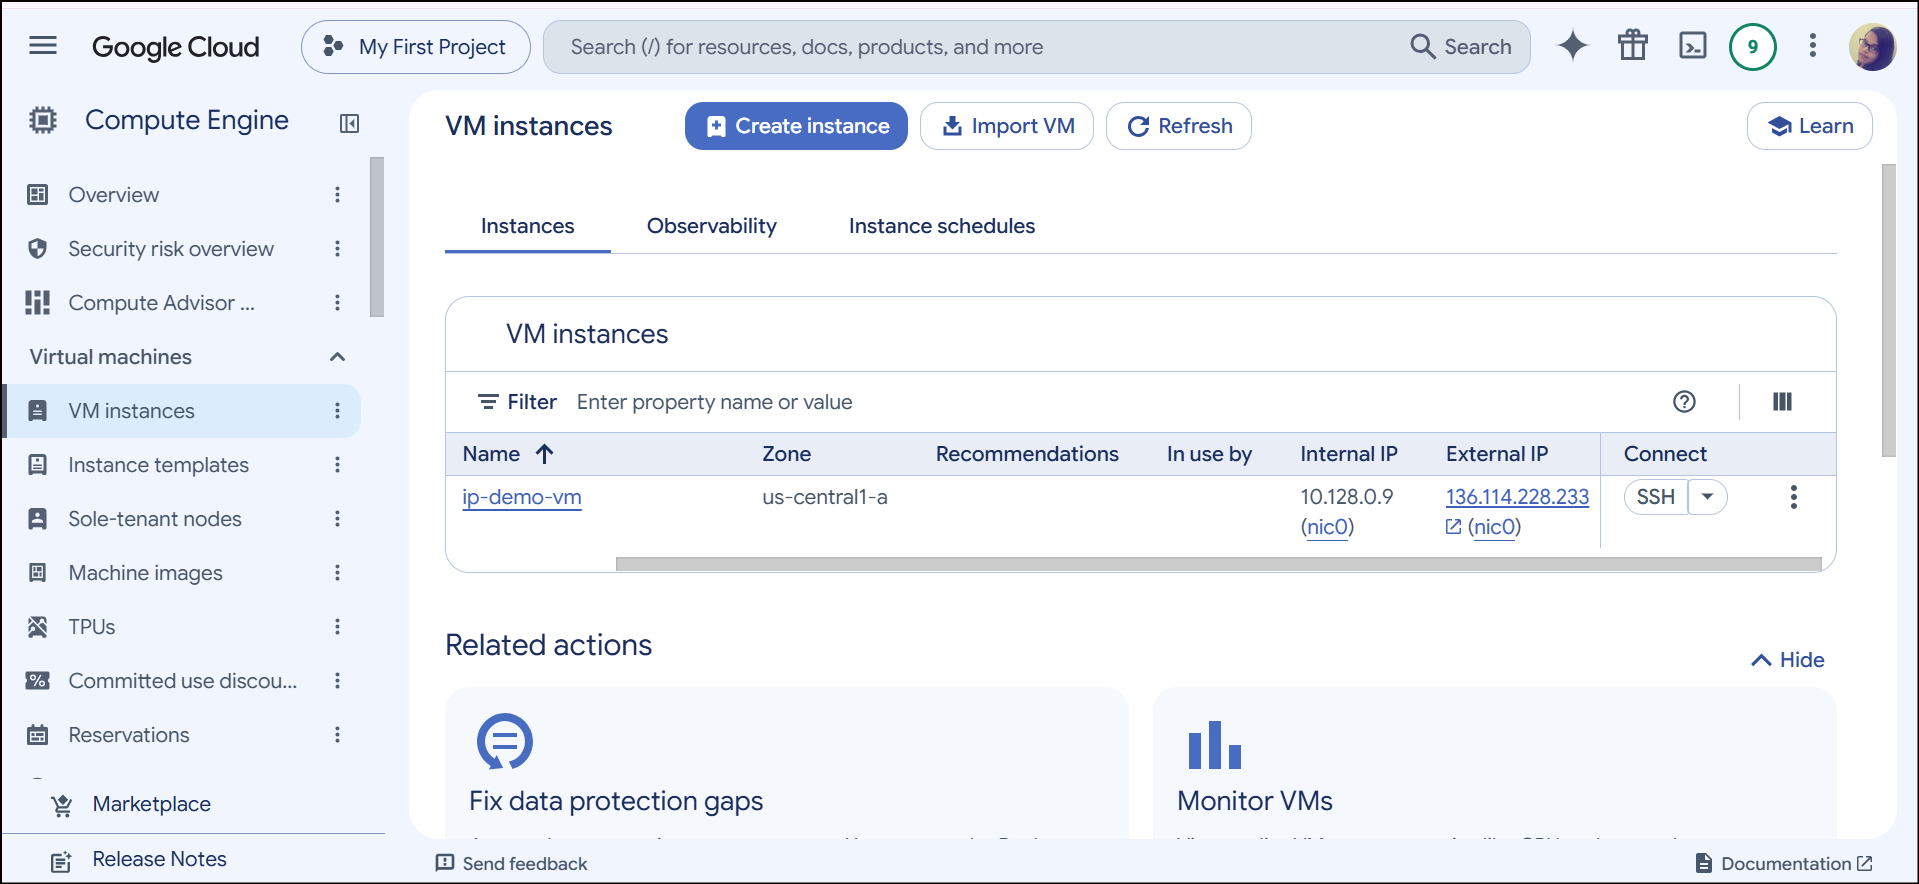
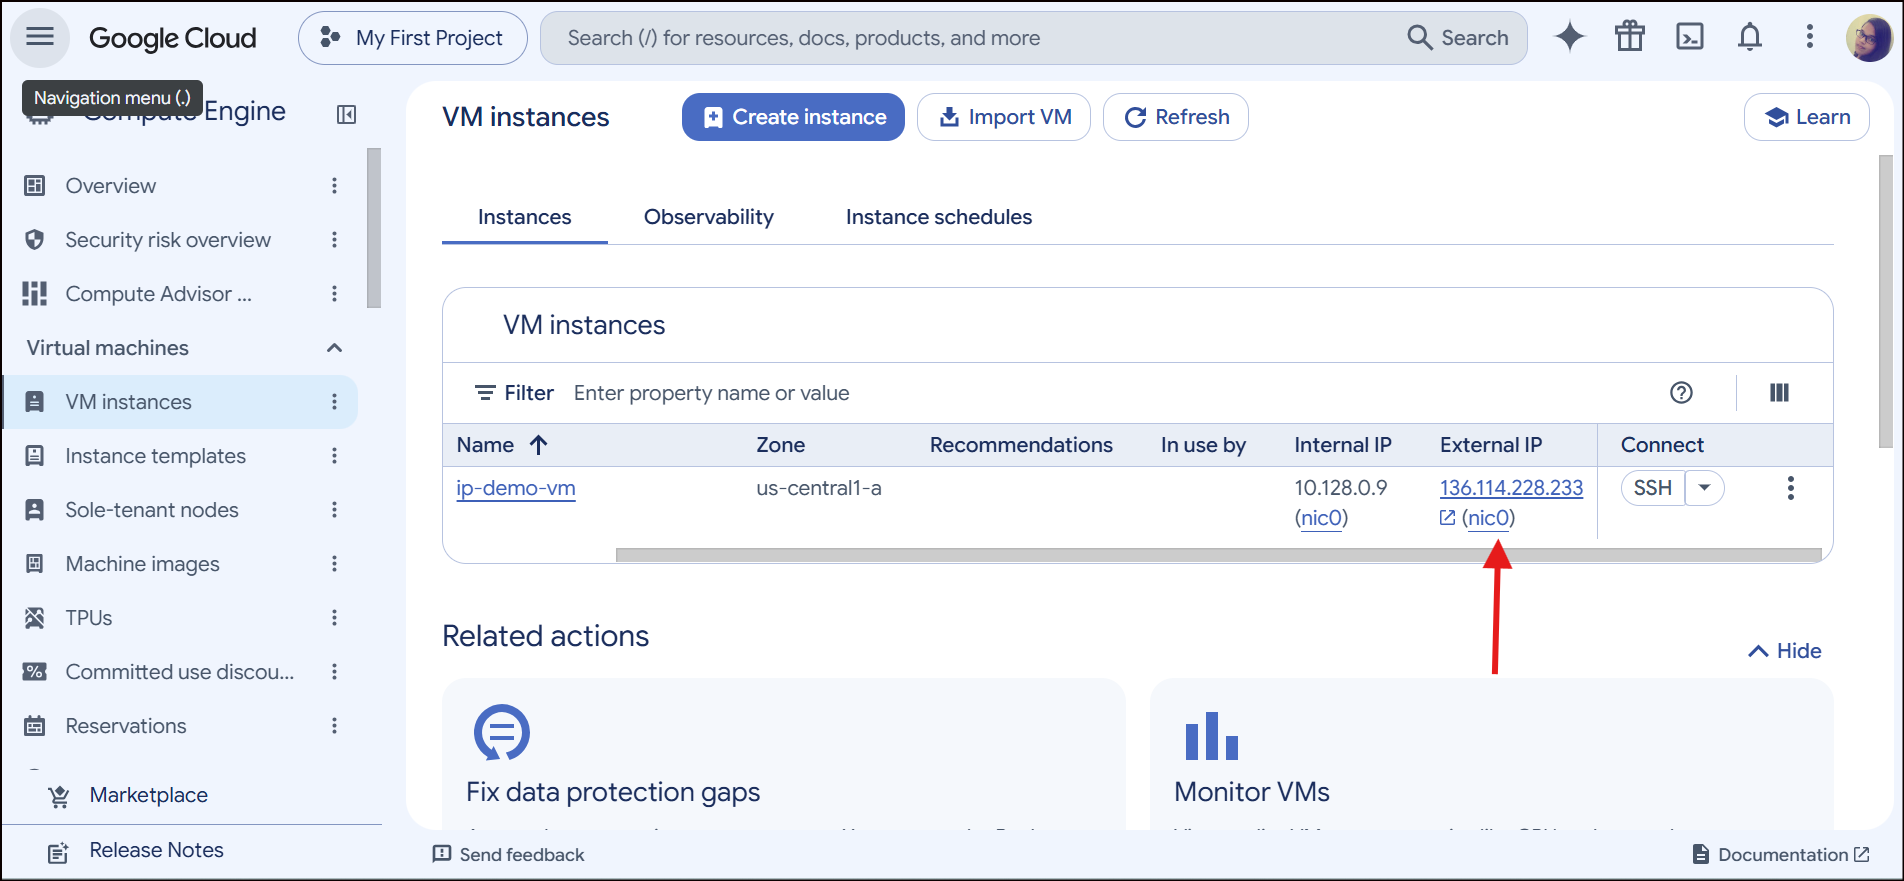
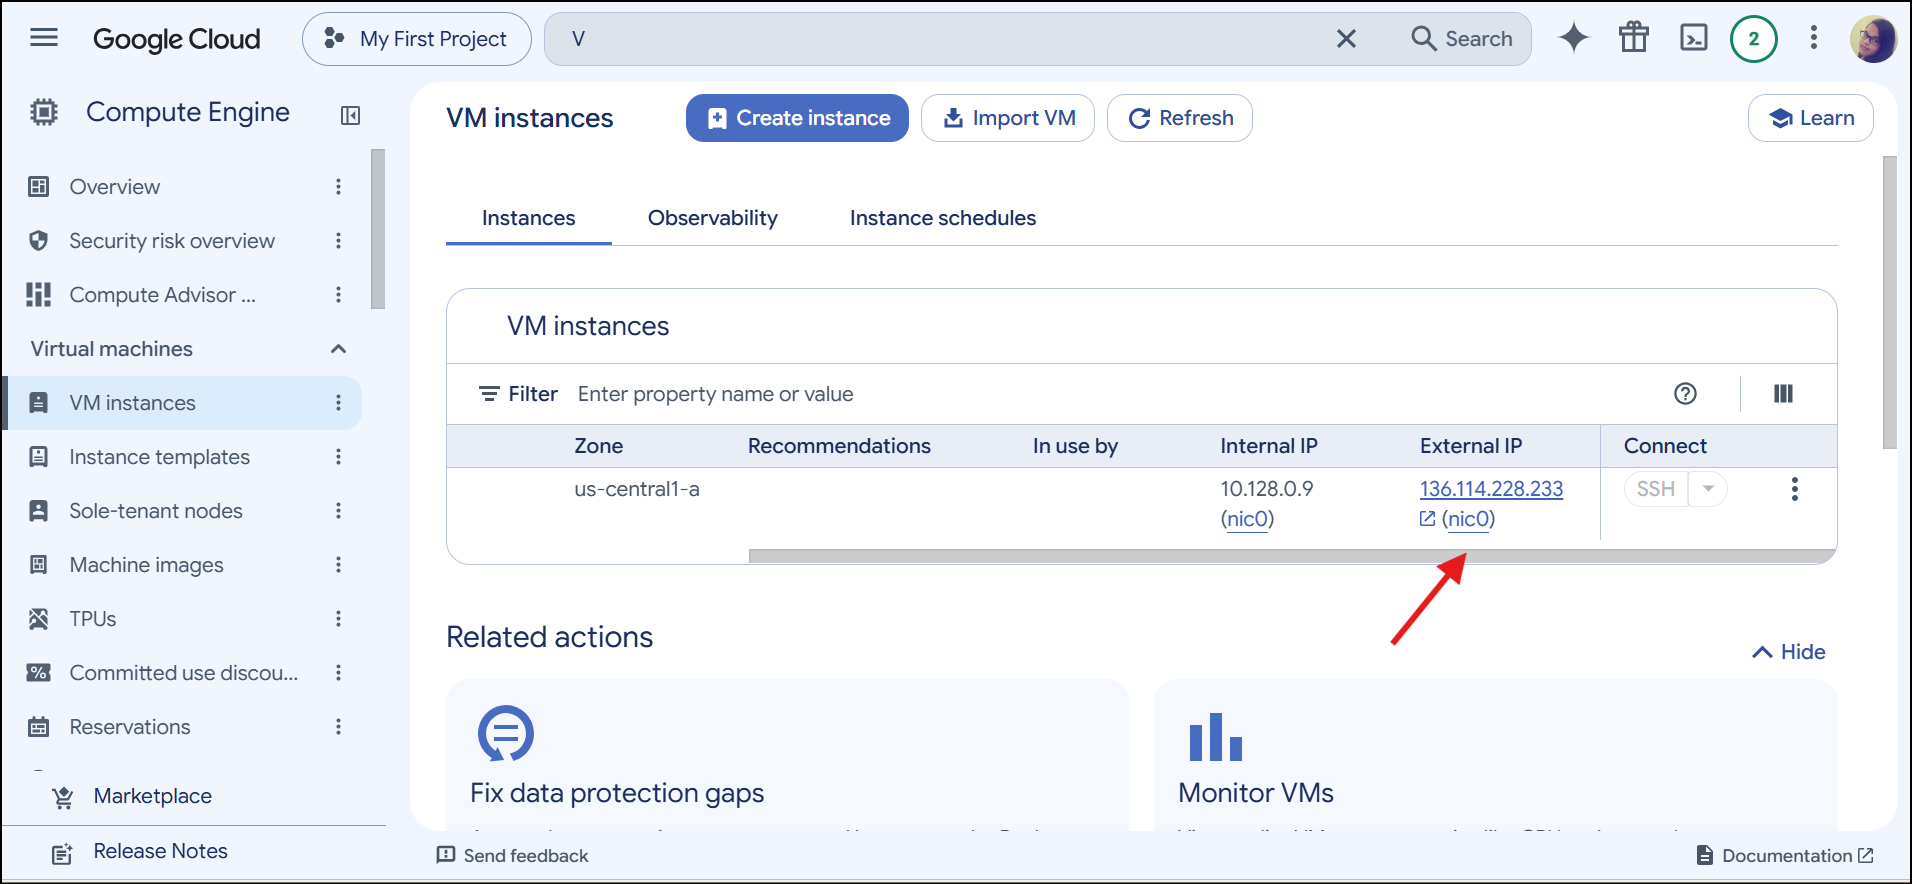
Note down the External IP address listed next to your new VM:
- Click the SSH button next to the VM to connect to it.
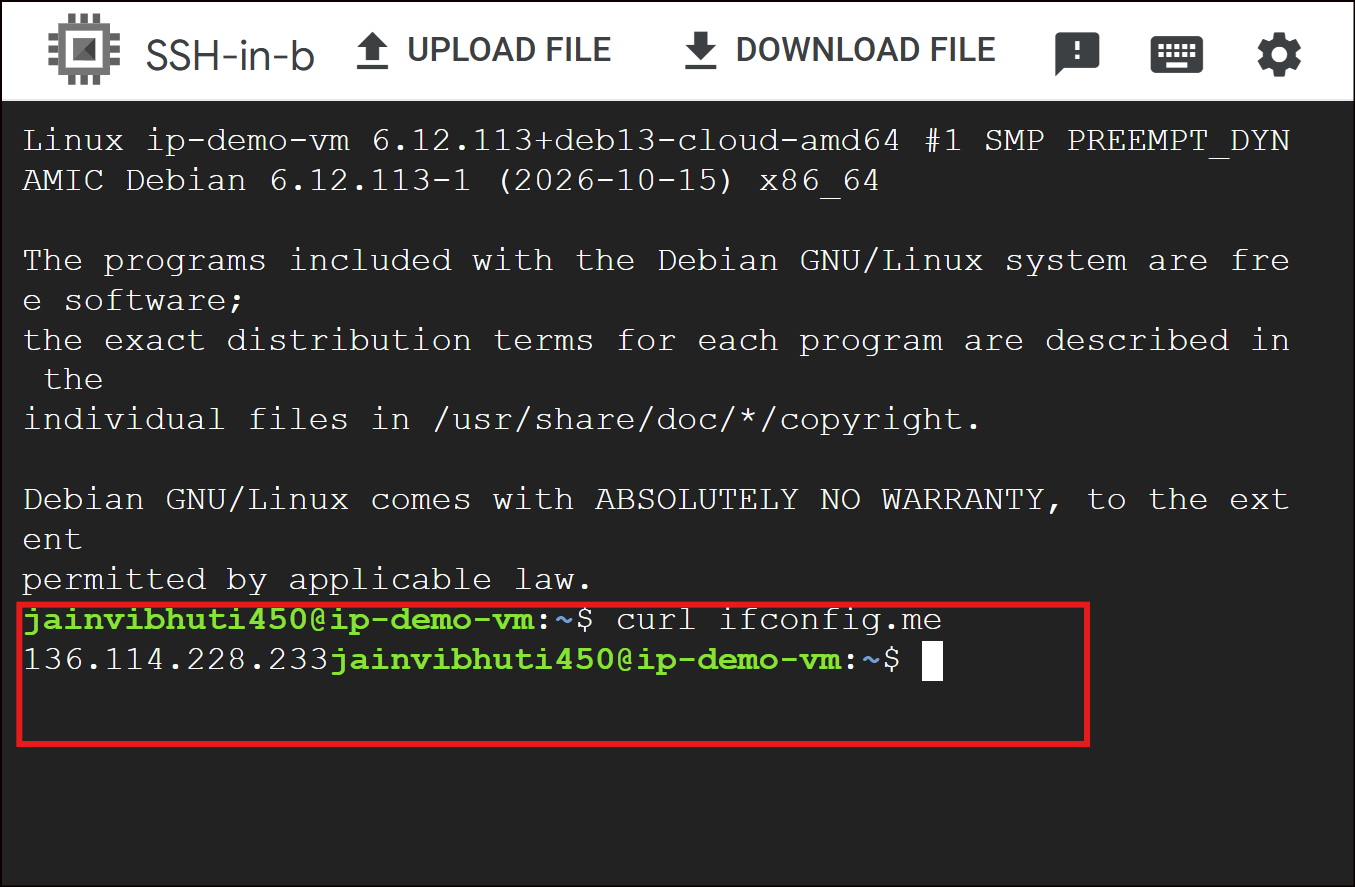
- Inside the terminal, run
curlifconfig.meto verify that the VM sees the same external IP.
- Go back to the GCP Console, select the VM, and click Stop. Wait a minute, then click Start.
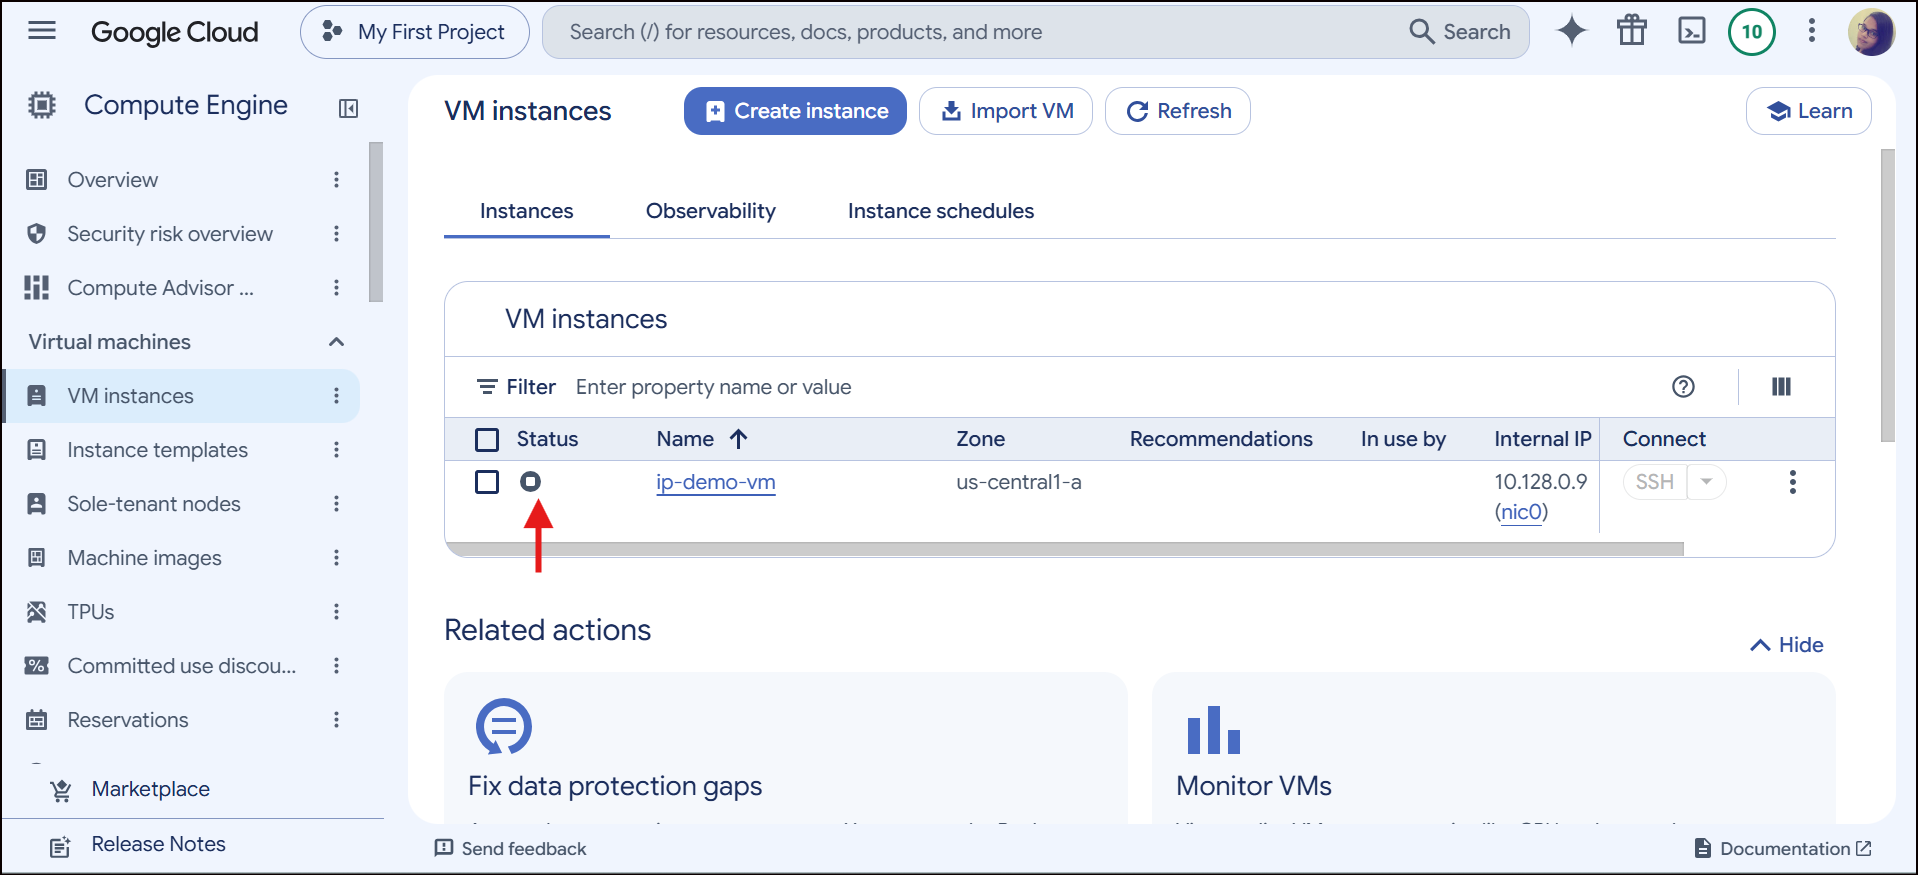
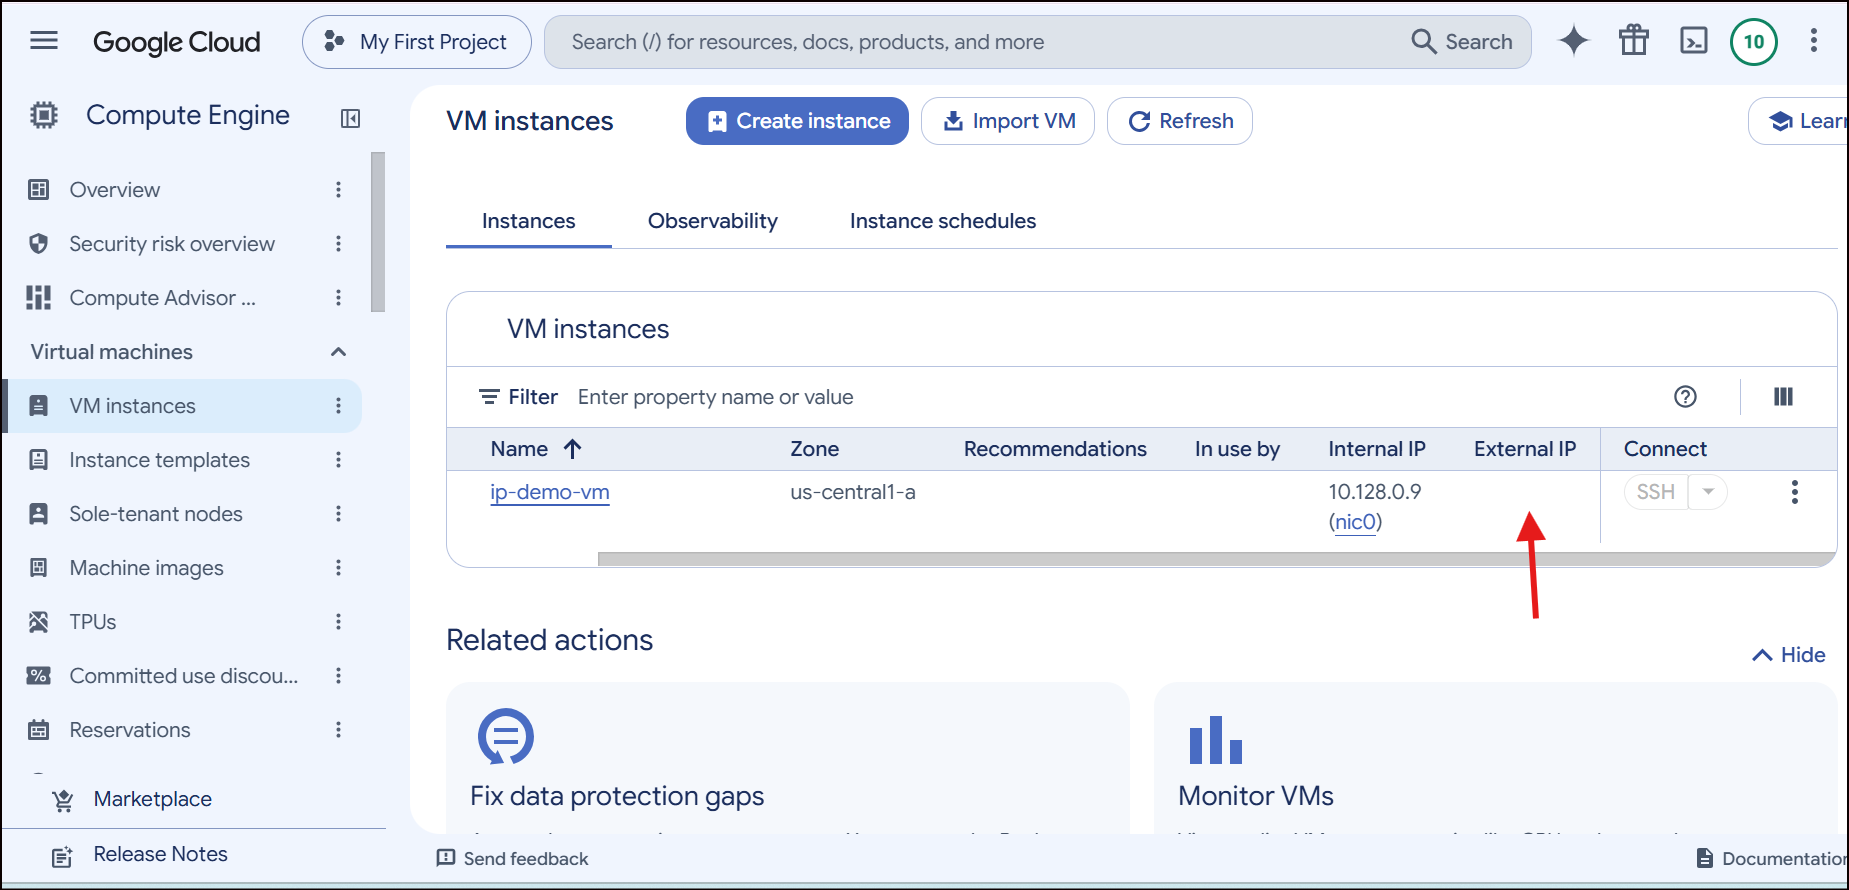
- Observe: The VM now has a completely different External IP address. Explain to your audience that ephemeral IPs are released back into Google's pool when a resource is stopped.
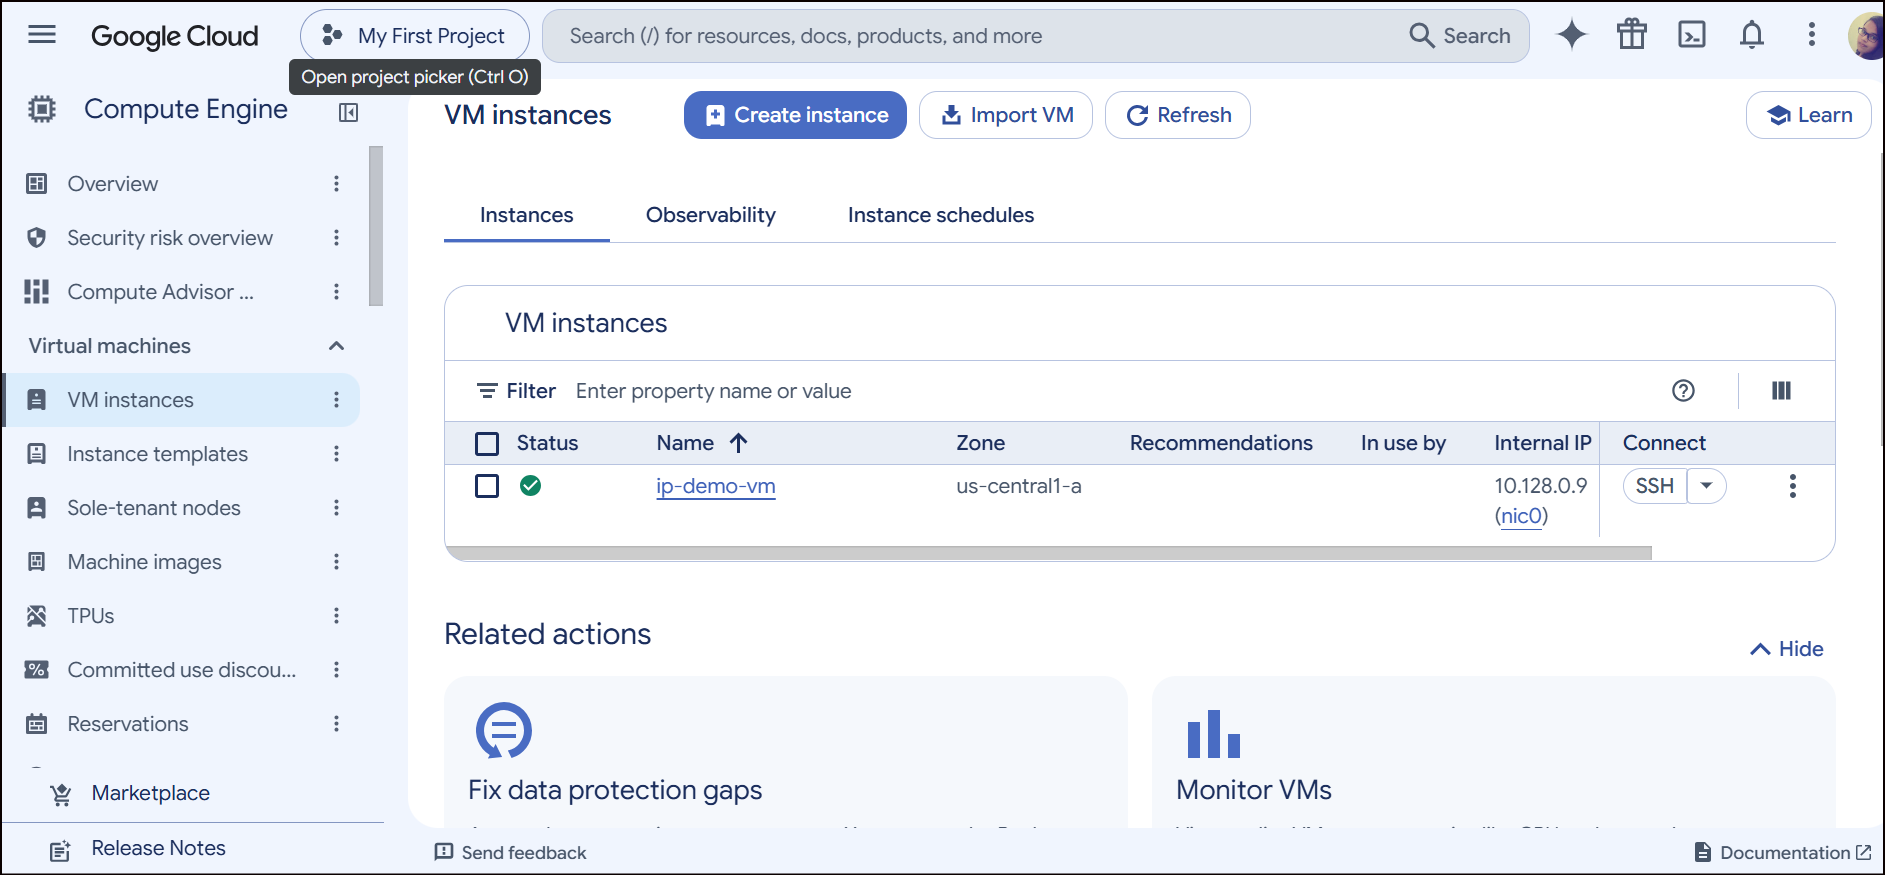
Start it again, and you will see the external IP again.
Promote to a Static External IP
Goal: Show how to lock down an IP address so it survives restarts.
- In the GCP Console search bar, search for VPC network and select IP addresses.
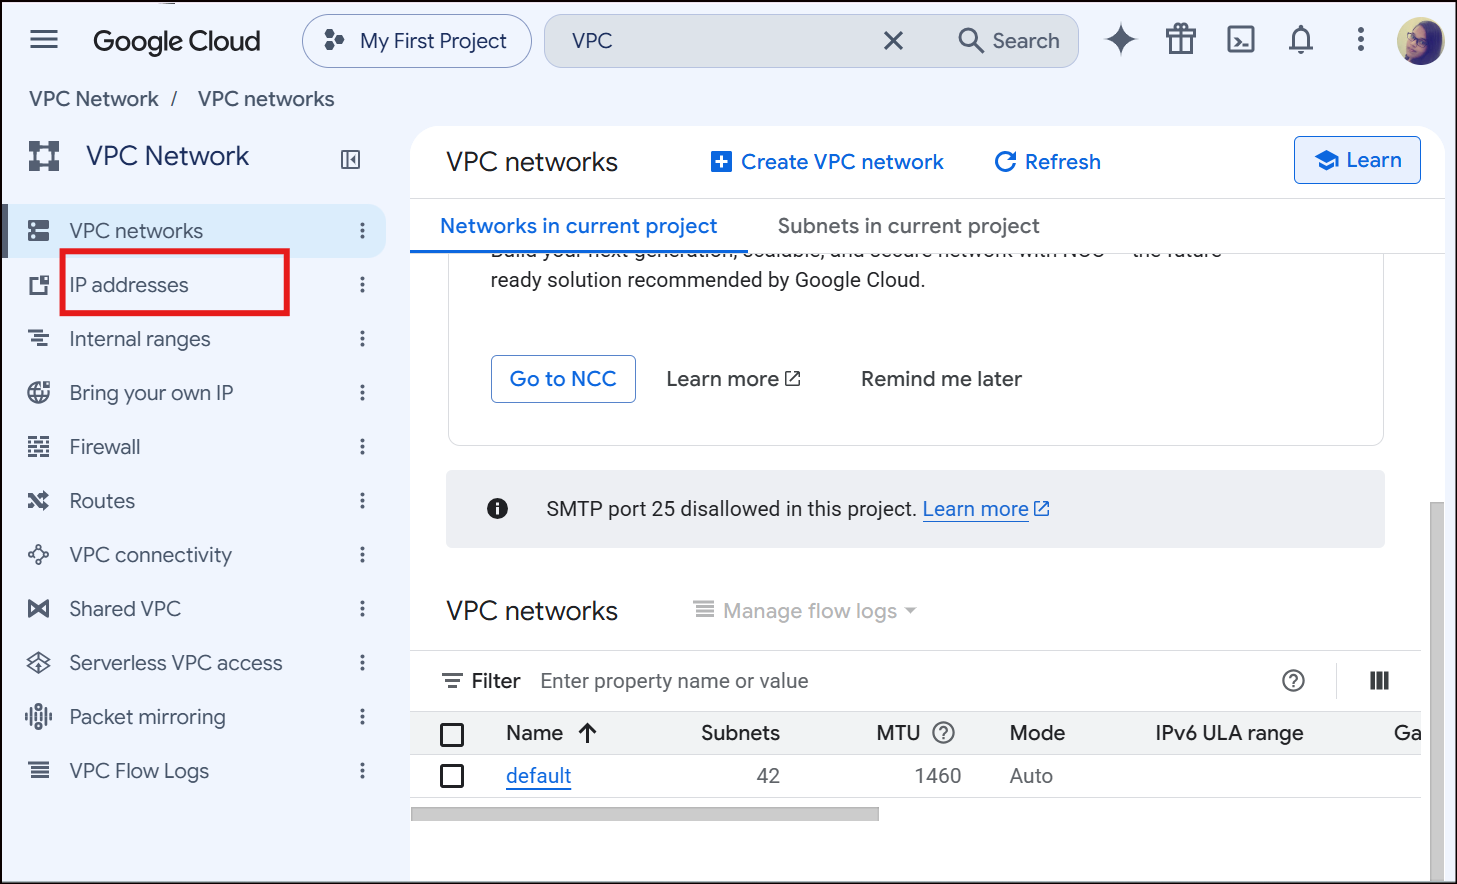
- You will see the current ephemeral IP assigned to your running VM.
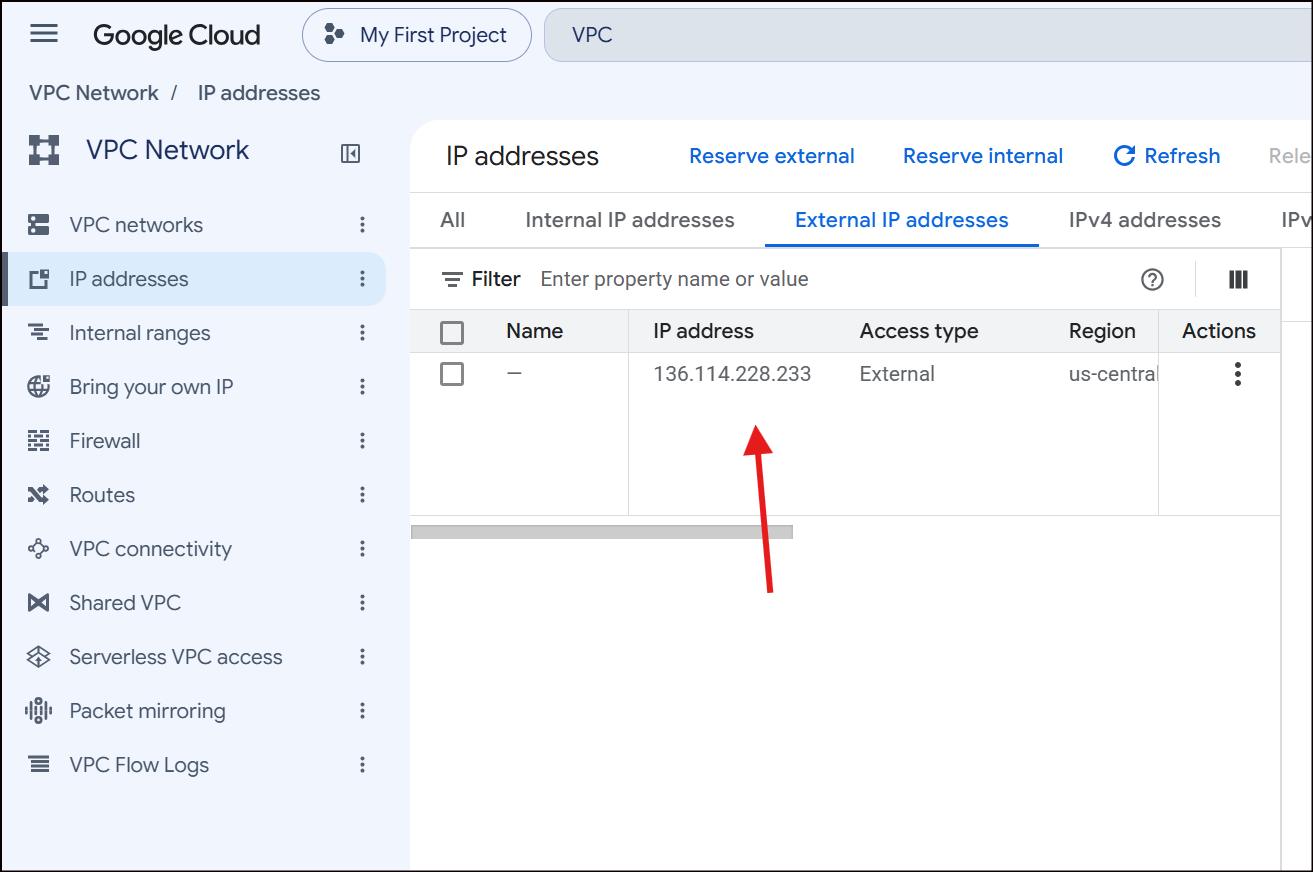
- Click the three dots (More actions) next to your VM's IP address and select Promote to static IP address
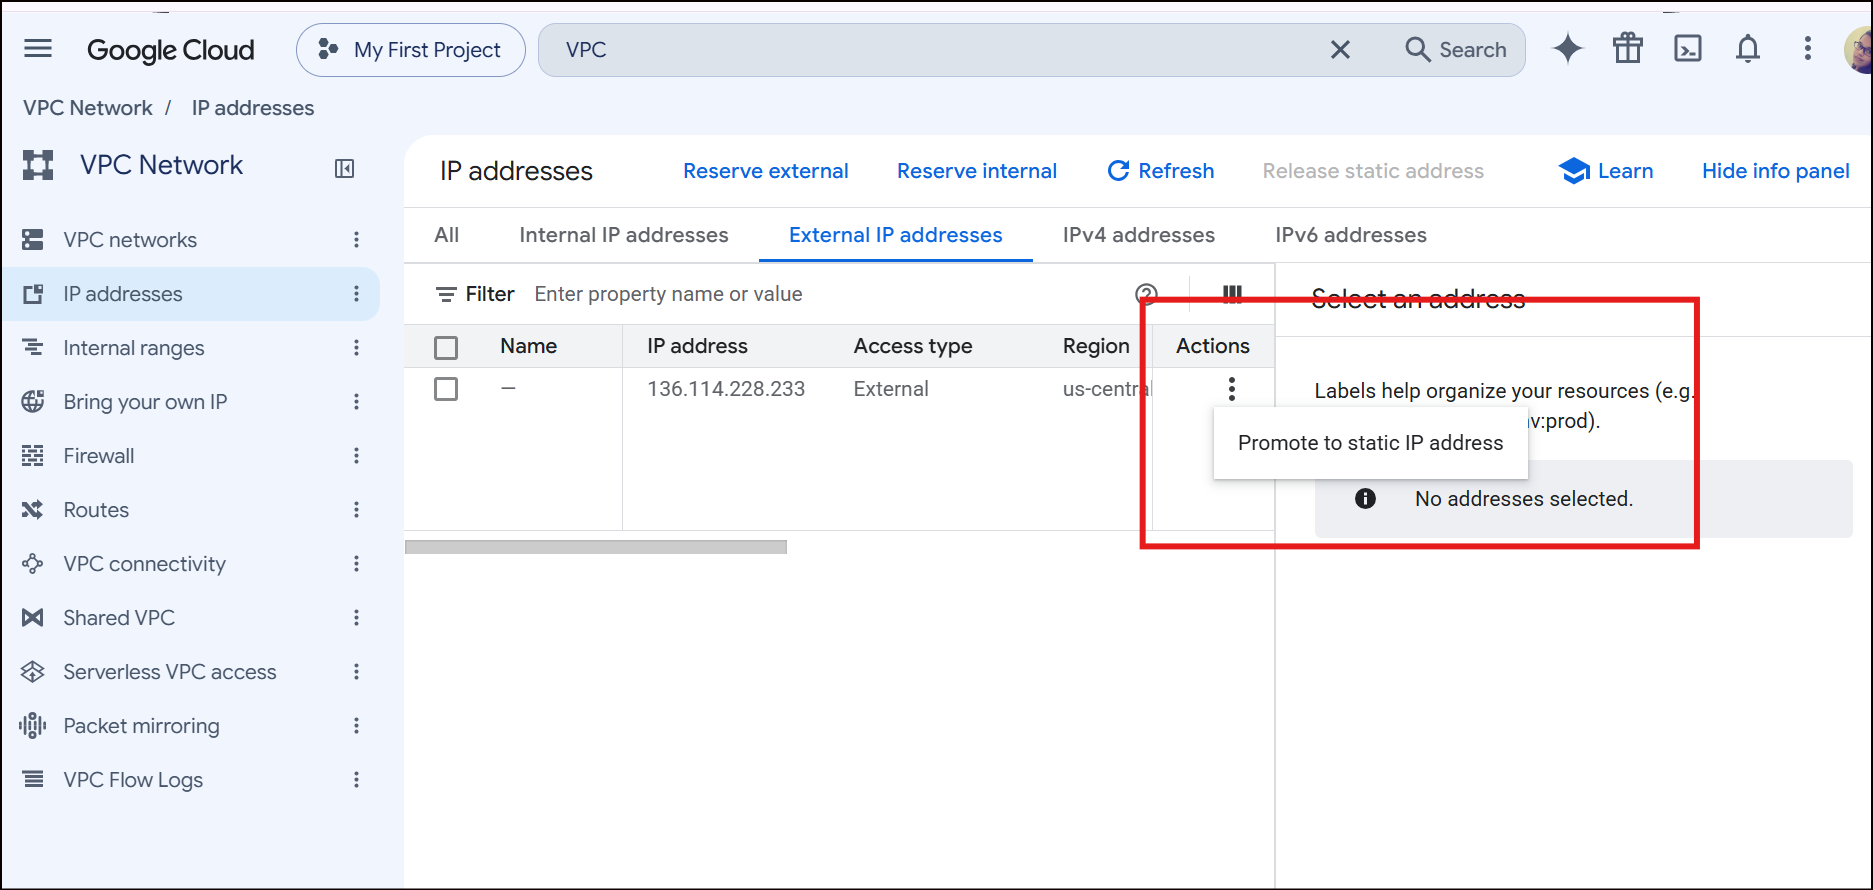
- Give it a name (e.g.,
demo-static-ip) and click Reserve.
- Go back to Compute Engine > VM instances.
- Select your VM and click Stop.
- Once stopped, click Start.
- Observe: The External IP address remains the same: 136.114.228.233
Clean Up (Important)
Goal: Prevent unnecessary cloud costs. GCP charges for static external IP addresses that are reserved but not attached to a running resource.
- Delete the VM instance.
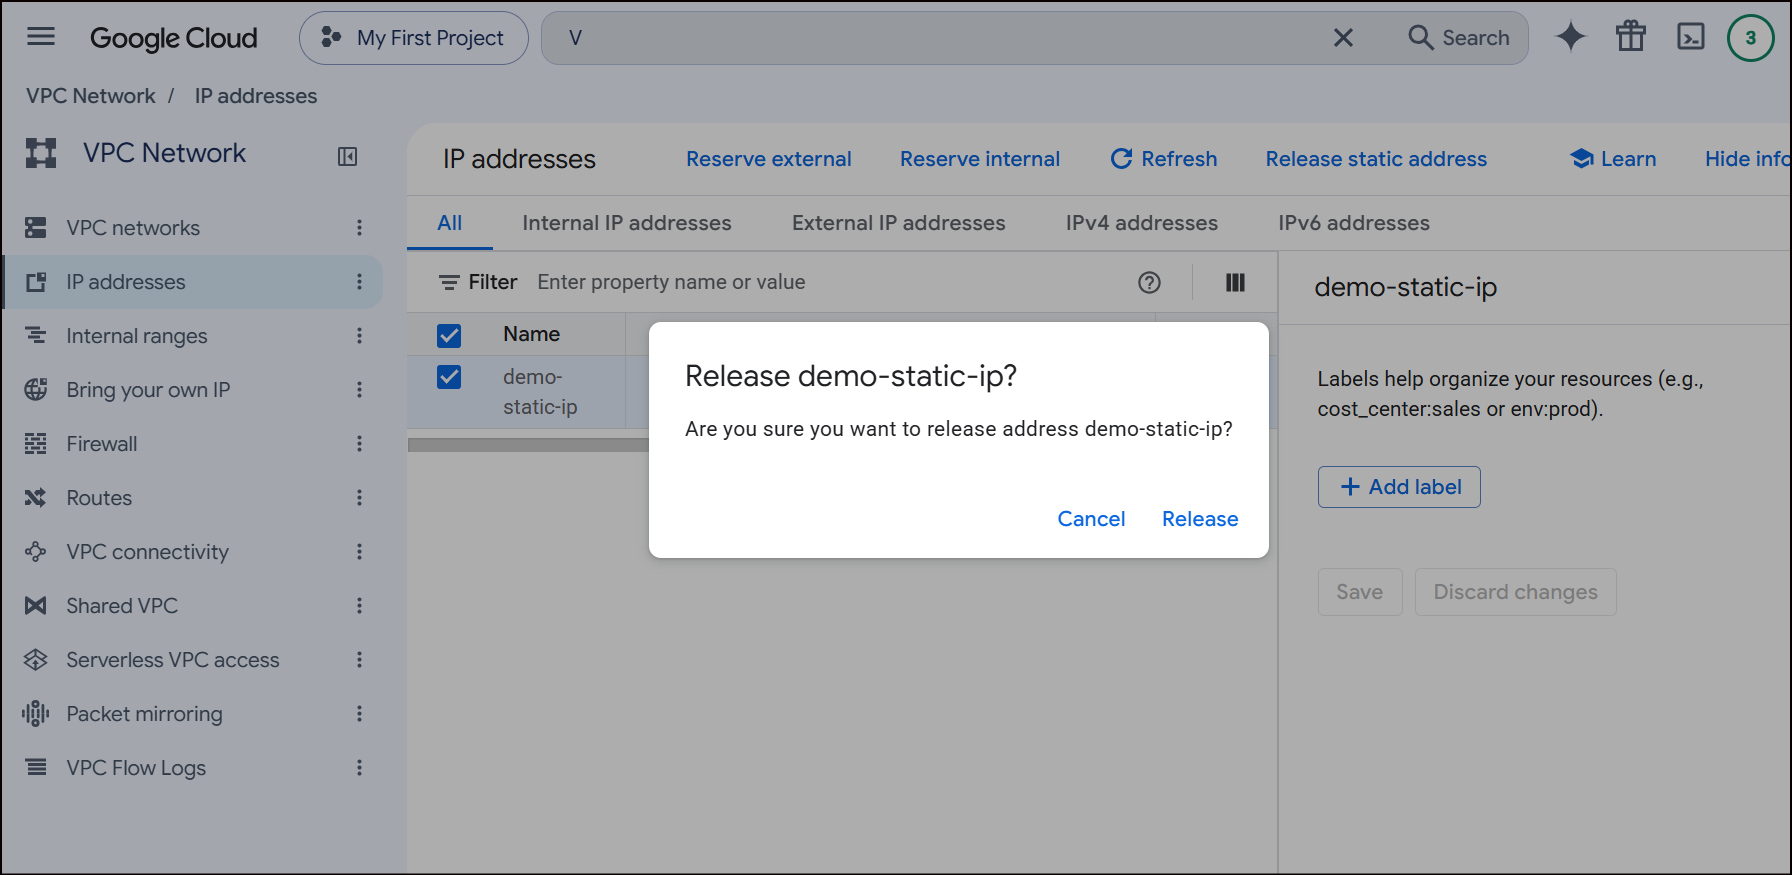
- Go back to VPC network > IP addresses.
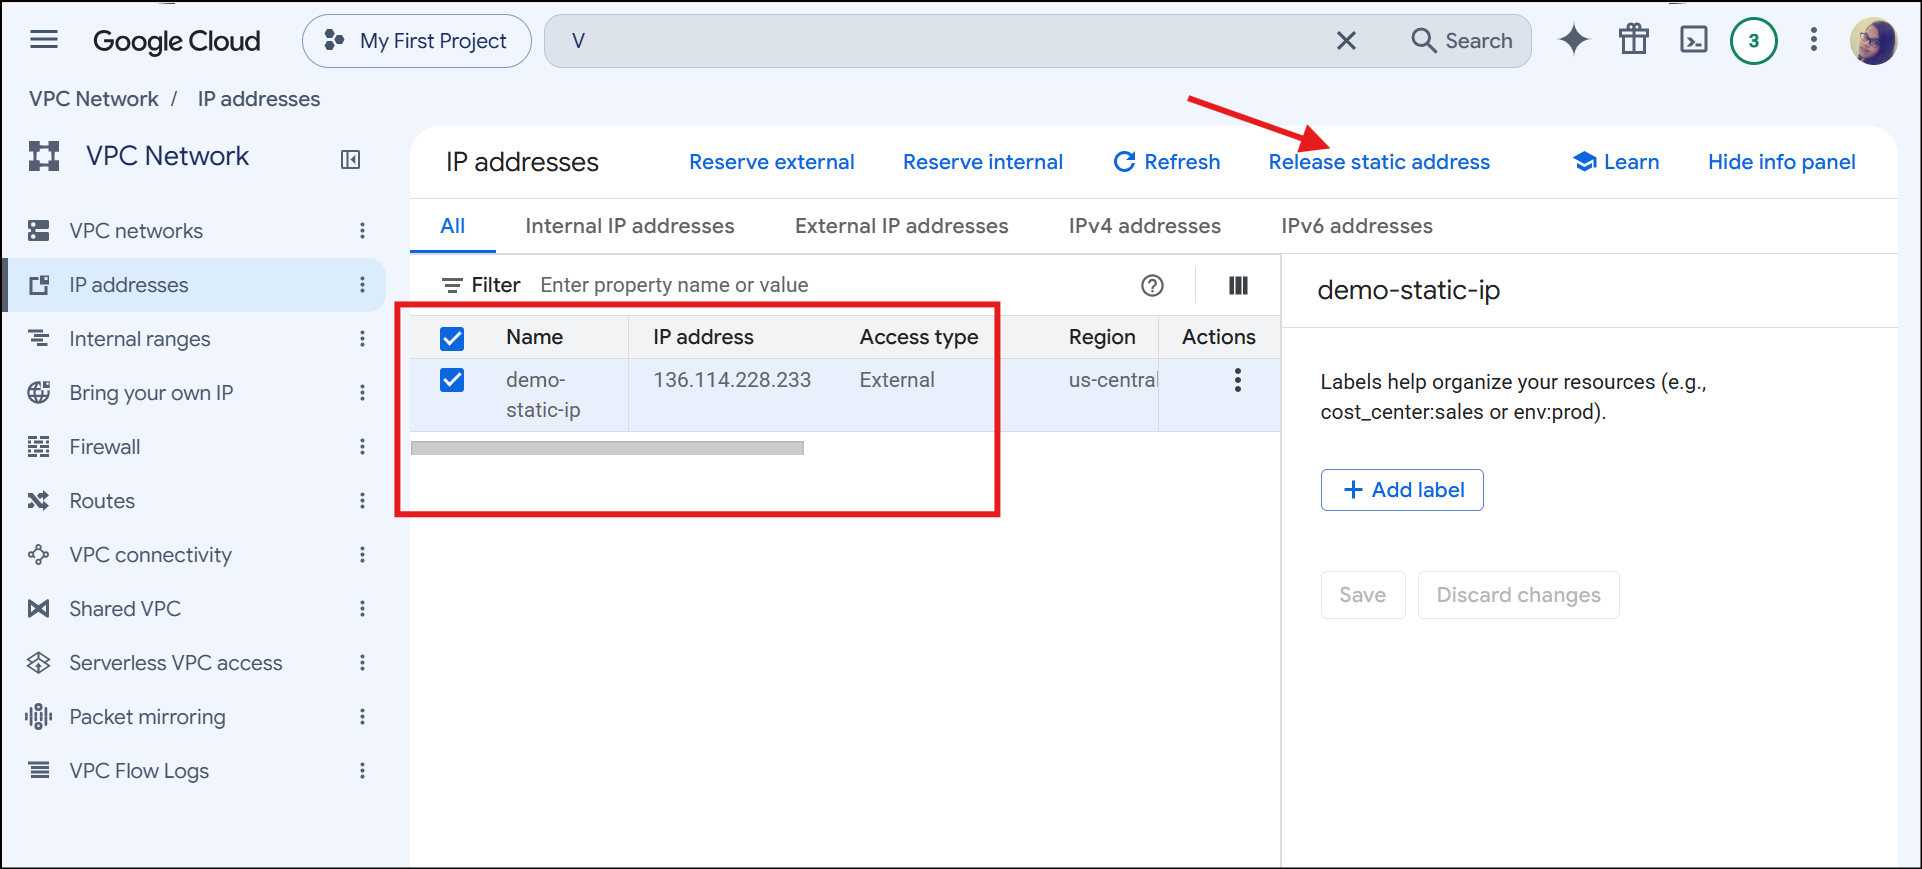
- Select your static IP (which should now show as "In use by: None").
- Click Release Static IP.
Takeaway: ephemeral IP addresses change whenever a GCP resource stops and restarts, while static IP addresses remain permanently locked to your project until you manually delete them.
- Ephemeral IPs: Free while the VM is running, but they are released back into Google's pool when the VM stops.
- Static IPs: Reserved exclusively for you. They survive restarts and deletions, but GCP charges a small fee if they sit idle.
About the author
Hi, I am Vibhuti Jain. A Devops Tools enthusiastic who keens on learning Devops tools and want to contribute my knowledge to build a community and collaborate with them. I have a acquired a knowledge of Linux, Shell Scripting, Python, Git, GitHub, AWS Cloud and ready to learn a lot more new Devops skills which help me build some real life project.
Comments
Join the discussionNo comments yet. Be the first to comment.
GCP Google Cloud Provider
A hands-on series on Google Cloud Platform: core services, setup guides, and practical tips for DevOps and cloud engineers.”